

How to Create Various Shibori Techniques Using Kadam Pakka Rang: A Step-by-Step Guide
Looking to add a splash of vibrant, handcrafted beauty to your life? Shibori, the ancient.
The Japanese art of tie-dye is the perfect way to express yourself. And guess what? Our Kadam Pakka Rang dyes are the ideal partner for this adventure!
With Kadam Pakka Rang's high-quality pigments, you'll get bold, long-lasting colors that perfectly capture the spirit of Shibori. Plus, our wide range of shades opens a world of possibilities for your creative designs.
Ready to dive in? We've got a whole new set of step-by-step Shibori tutorials using our very own Kadam Pakka Rang. You'll master these stunning tie-dye techniques in no time, creating unique and eye-catching pieces!
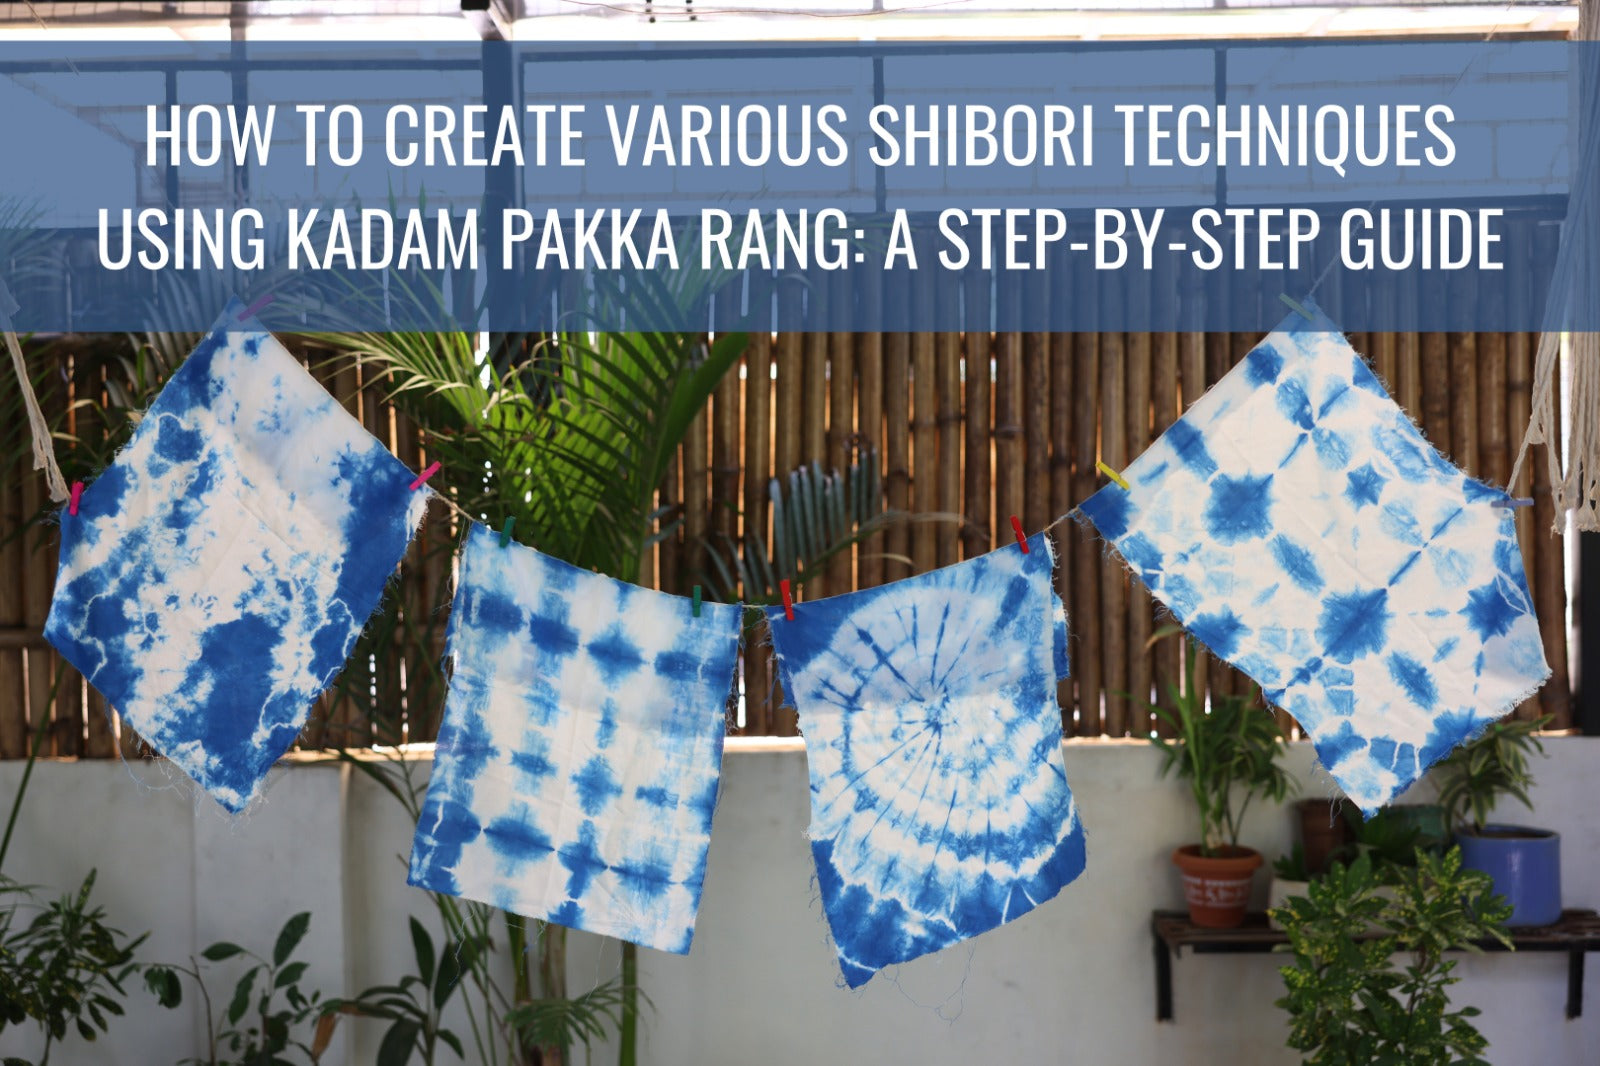
Understanding Different Shibori Techniques
Shibori is a Japanese term for a variety of manual resist dyeing techniques. It involves manipulating fabric before dyeing to create patterns and designs.
- Arashi, also known as pole-wrapping. It involves wrapping fabric around a pole tightly and then scrunching it down to create a pleated effect.
- Itajime, which involves folding and clamping fabric between wooden or acrylic boards to create symmetrical and geometric patterns.
- Kumo Shibori, also known as spiderweb Shibori, involves creating patterns resembling spiderwebs. This technique requires pleating, binding, and stitching.
- Nui Shibori, or stitched Shibori, the fabric is gathered and stitched before dyeing, creating beautiful and detailed designs.
Step-by-step guide for Arashi Shibori:

-
Prepare your fabric: Bind and shape your fabric on the PVC pipe using rubber bands and string to create your desired patterns.
-
Create the dye bath: Dissolve Kadam Pakka Rang dye and salt in hot water in a bucket.
-
Dye the fabric: Submerge your prepared fabric in the dye bath for 15-20 minutes.
-
Prepare the Dyfix solution: In a separate bucket, dissolve the Dyfix sachet in 4-5 liters of water.
-
Set the color: Transfer the dyed fabric directly into the Dyfix solution and let it soak for 12-15 minutes.
-
Rinse thoroughly: Rinse the fabric with tap water until the water runs clear.
- Dry: Air dry the fabric away from direct sunlight.
A step-by-step guide for Itajime Shibori:

-
Prepare your fabric: Shape your fabric on the cardboard using rubber bands to create patterns (if desired).
-
Create the dye bath: Mix hot water, salt, and Kadam Pakka Rang in a container.
-
Dye the fabric: Submerge your fabric in the dye bath for 15-20 minutes.
-
Prepare the Dyfix solution: Dissolve the Dyfix sachet in 4-5 liters of water in a bucket.
-
Set the color: Transfer the dyed fabric to the Dyfix solution and let it soak for 12-15 minutes.
-
Rinse: Wash the fabric with tap water until the water runs clear.
- Dry: Air dry the fabric, avoiding direct sunlight.
Step-by-step guide for Kumo Shibori:

-
Prepare the dye bath: Dissolve Kadam Pakka Rang and salt in 4-5 liters of hot water. Stir thoroughly.
-
Immerse the saree: Gently submerge the cotton saree in the dye bath.
-
Soak and fix: Let the saree soak in the dye bath for 12-15 minutes.
Afterward, transfer it directly to a bucket containing the Dyfix solution (follow package instructions) for the same amount of time. This will set the color.
-
Rinse thoroughly: Rinse the saree under running tap water until the water runs clear. This removes excess dye.
-
Dry carefully: Hang the saree to dry, avoiding direct sunlight to prevent fading.
-
Enjoy your new look: Your beautifully dyed saree is ready to wear!
- Share your results: Show off your DIY skills and the gorgeous transformation.
Step-by-step guide for Nui Shibori:

-
Dampen the fabric: Dampen the fabric to let the dye spread evenly for vibrant colors.
-
Mark and stitch the fabric: Use a pencil or fabric marker to mark the desired pattern on the fabric. Thread a needle and stitch along the marked lines.
-
Pull the thread: Once you've finished stitching, gently pull the thread to gather the fabric to create the desired pattern and texture.
-
Apply the dye and let it sit: Prepare the Kadam Pakka Rang dye according to the instructions and apply it to the fabric. Let the dye sit for 25-30 minutes.
- Lock and rinse: Prepare Kadam DyFix Solution to prevent color bleeding, and place the fabric in it. Rinse the fabric until the water runs clear and let it dry.
Conclusion:
By mastering various Shibori techniques, you can now create stunning and unique designs on fabric. With Kadam Pakka Rang your creations will be vibrant and long-lasting.
Remember, Shibori is a versatile art form that allows for endless experimentation and creativity. So explore different folding techniques, dyeing methods, and color combinations. The more you practice and experiment, the more you'll discover new ways to express your artistic vision.
Leave a comment